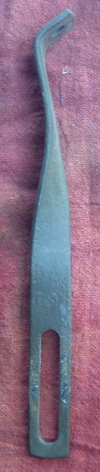
Alternator Adjustment Bracket
Description
If you use the GM 1-wire alternator setup mounted below the fan, you
need a method to tighten the belt.
While I was expermenting with different solutions, I found a
generator adjustment bracket off an old tractor and decided to try it.
After one bend and one twist I had found the solution I liked. The
entire alternator installation is self contained to the engine and
looks like it might have come that way.
Materials
- 1/8" x 3/4" flat stock steel.
Tools
- Drill or Drill Press
- Hacksaw or Bandsaw
- Cutoff disk in Right Angle Grinder (or a Milling Machine )
- 1/4" Drill Bit
- 3/8" Drill Bit
- 10" or 12" Adjustable Wrench
- Vise
Steps
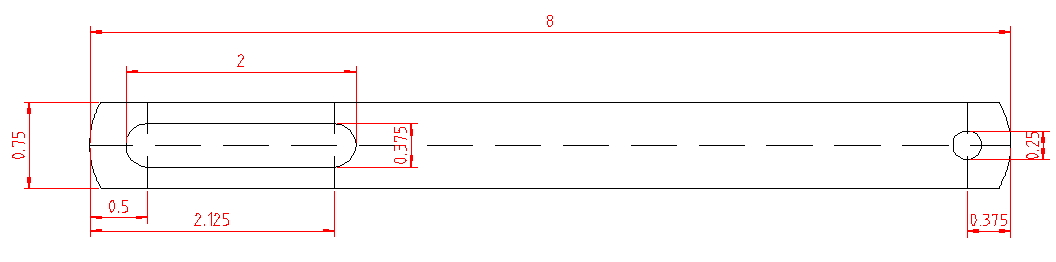
Refer to Figure A below for steps 1-4 and 8.
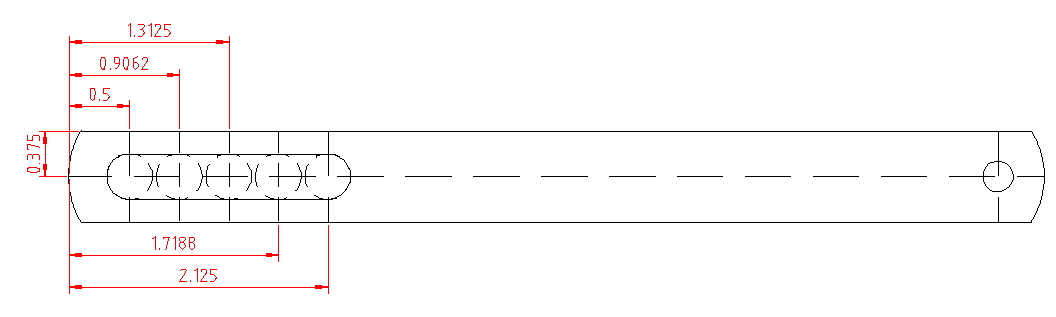
Refer to Figure B below for step 6-7.
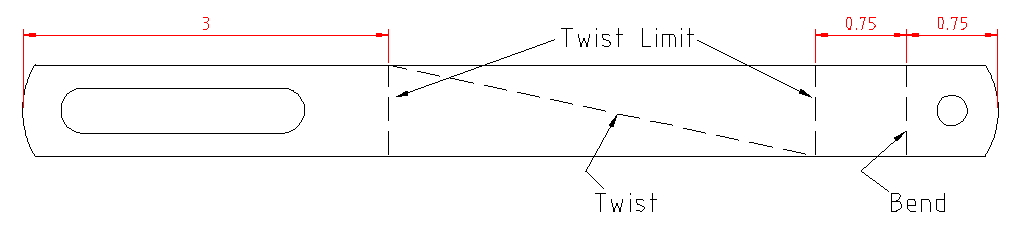
Refer to Figure C below for steps 9-12.
- Cut the flat stock 8" long. Make sure each end of each piece of
flat stock is square. Square the ends if necessary.
- Drill the 1/4" hole centered 3/8" from one end..
- Drill a 3/8" hole centered 1/2" from the opposite end.
- Drill a 3/8" hole centered 2-1/4" from the same end.
- If you are using a Mill to slot the bar, jump to step 8.after
milling out the slot.
- Drill 3 3/8" holes centered between the last 2 drilled holes
- Using the Cutoff Disk in the Angle Grinder, cut out the remaining
material between the 5 3/8" holes to create the slot.
- Round each end of the piece to create a small arc on each end.
- Put the end of the stock with the 1/4" hole in a vice 3/4" from
the end.
- Bend the stock to approximately 60 degrees.
- Put the end of the stock with the slot in a vice 3" from the end
- Use the adjustable wrence to twist the stock 90 degrees.
Application

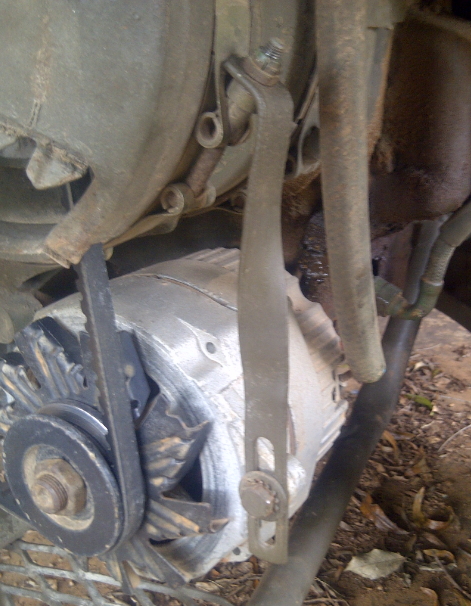
Bracket Installed ( Click on image to enlarge. )